The content of the article:
- Choosing a film
- We select materials and tools for work
- Making a pattern for the side glass
- Making a pattern for the rear window
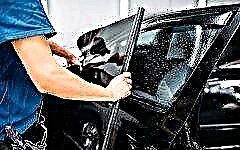
- Car side glass tinting
- Rear window tinting
- We tint the windshield
Car glass tinting is very popular among car owners. One of the reasons for the popularity of tinting is the ability to personalize the car's appearance. The creation of coziness in the car's interior also plays an important role.
Modern films allow you to almost completely close the interior from prying eyes. At the same time, their light transmittance does not affect the quality of the view. In the article, we will talk about how to perform toning with high quality without resorting to the services of a tuning studio.
Choosing a film

The modern market for car tinting films is truly huge, and a separate article is needed for a high-quality review. The main recommendation when choosing a film is to refrain from purchasing simple sets from Chinese manufacturers. The miser pays twice, and the quality of Chinese goods leaves much to be desired in most cases.
If you want a high-quality finish, get quality roll-to-roll film. It will not be superfluous to talk to film sellers and listen to the reviews of motorists who have already done tinting.
We select materials and tools for work

The set of tools for toning is not very large and is quite affordable for purchase:
- Sprayer (manual);
- Scraper;
- Sharp scissors;
- Paper napkins);
- Metal ruler;
- Sponge (hard);
- Forcing (soft and hard);
- Stationery knife;
- Installation hair dryer.
In addition to the film itself, soap solution is the main consumable when tinting a car. It is not difficult to prepare it - five drops of detergent for a car are taken for one and a half liters of water. The solution should be thoroughly mixed and poured into a spray bottle. The solution is intended for high-quality cleaning of tinted surfaces and simplifying its smoothing during the pasting process.
Making a pattern for the side glass

For any part of the car that you intend to tint, you must first cut out a pattern. When making patterns, you should adhere to a few simple rules.
First, find the adhesive layer. This is easy to do - just look at which side the transparent protection is.
Cutting is always carried out along the roll, while it is necessary to give a small allowance for further adjustment. The allowance is made in a few centimeters. The beginning of making a pattern begins with moistening the glass and cutting off a piece of the required size from the roll, which must be placed on the moistened glass with a protective layer towards you.
Then it is necessary to align the lower edge of the workpiece parallel to the lower glass seal. The workpiece should be positioned with an overlap of about one centimeter on the seal. After this, vertical cuts are made in the pattern blank so that it has an overlap on the vertical sealing edge of the door.
After completing these operations, the lower part of the film is folded and secured to the upper edge. By fixing the film along the edge of the glass, you can make an upper horizontal cut and give the pattern a finished shape.
The pattern for non-opening glasses is made with a smaller allowance than the previous one. The allowance should be only a few millimeters.
For these glasses, the cutting of the film is performed in the same way as for moving glasses. It is also placed on the moistened glass with the adhesive side facing you. Special care should be taken here, where the opaque area is limited by the sealant.
In order not to damage the seal, it is necessary to cut the film using forcing, which is applied to the seal for safety reasons. Remember to always have a sharp knife for a clean and quality cut. At the slightest dullness, remove parts of the blade that have become unusable. If there is an opaque layer of paint on the glass, make a pattern that slightly overlaps with the paint.
Making a pattern for the rear window

Making a pattern for the rear window is slightly different from that for the side windows. Unlike previous works, we need dry glass and dry film. Next, we write the letter "H" with a wet sponge on the glass.
The film is laid on the glass along the roll, and its adhesive surface must be facing outward. As before, a sufficient allowance must be made, taking into account the sphericity of the glass.
We carefully cut off the excess toning material. It is not very convenient to do this alone, and it is good if you have a partner. The workpiece is aligned on the glass in such a position that it does not have horizontal folds - only vertical folds are allowed for this operation. The film is smoothed with light horizontal and vertical movements.
It is to smooth out the folds of the film that you will need an assembly hair dryer. During this operation, special care should be taken not to overheat the workpiece.
It should be remembered that only vertical folds are smoothed out by heating. After removing all wrinkles, apply soapy water to the glass and the pattern and smooth again. If everything was done neatly, the film will take the shape of glass and will not have wrinkles.
The blank for the pattern is smoothed from the center to the edge. This operation must be done carefully, and to simplify the work, use forcing. Pay special attention to the creases in the film - they should not be. The film must be smoothed out neatly and evenly.
The final step in creating a pattern for glass is precise trimming of the edges. The cutting line, which will run along the workpiece, must slightly overlap the opaque areas of the glass. To facilitate this task, use the lighting positioned in the vehicle interior.
Car side glass tinting

After all the necessary patterns have been prepared, you can start toning. Before starting pasting, you will need to thoroughly clean the glass. This operation is performed using a scraper and abundant wetting with the prepared solution.
After cleaning the lower glass segment, the upper glass section is cleaned. To perform this operation, you need to lower the glass. Watch carefully for any uncleaned areas.
After processing the glass with a scraper, it must be thoroughly washed again with a hard sponge. Wipe the glass with rubber distillation, and its edges with a paper napkin. After finishing processing, once again thoroughly wet the glass and go over it with a rubber forcing. All these operations are necessary for high-quality adhesion of the film to glass.
Immediately before gluing the film itself, the glass is again abundantly wetted with soapy water. They begin to paste over the glass, lowering it from above by a couple of centimeters. A part of the protective layer is removed from the pattern, about two-thirds of the size of the pattern itself. The adhesive layer is also moistened with soapy water.
If you do not have a sufficient support surface at hand, you can perform the removal of the protective layer on the hood or rear window. Before starting work, it is advisable to cut off the removed part of the protective layer so that it does not interfere.
In addition to wetting glass and film, wet your hands too. Hands must be washed, since during the pasting process they will come into contact with the adhesive of the pattern.
After preparation, the pattern is neatly placed on the glass. Avoid contact of the film with seals and other parts. The pattern is aligned in accordance with the upper edge of the glass to be glued, and after checking for gaps, the liquid is carefully squeezed out from under the film to be glued.
At the initial stage of squeezing out the mortar, it is possible that the pattern will slide a little on the surface, so hold it with your hand for insurance. The solution is squeezed out from the center to the edge of the pattern. Soft material is used first and then forcing from hard material.
The hard forcing is used in the same way as the soft forcing - from the center to the edge. The pattern is fixed to the edge of the glass along the upper edge with the help of forcing and a blow dryer. Excess patterns protruding beyond this edge are cut off with a knife to avoid leaving gaps.
After pasting the upper part of the glass, it rises and is abundantly wetted with a solution in the lower part. The protective layer is finally removed and the film is carefully tucked under the lower glass seal. During this operation, care should be taken that no creases occur on the pattern. It is convenient to bend the seal using forcing.
The solution is removed from under the pattern, as in the previous cases. You can finally eliminate moisture by forcing, wrapped in a napkin. Make sure again that all the solution has been removed and that there is no air or moisture left under the pattern.
Blind car windows are glued using a similar technology.
Car rear window tinting

Since this car glass is in most cases equipped with heating filaments, cleaning it is slightly different from cleaning the side windows. It is not recommended to use a scraper for this purpose - it is better to use a plastic spatula. After processing the glass with a spatula, rinse it thoroughly with a hard sponge, wipe it with napkins and hard distillation.
The glass, as in the operation with the side windows, is abundantly wetted with soapy water. After removing the protective layer, immediately wet the adhesive with the solution. Next, the pattern is drawn over the glass. The film tends to curl, so it is advisable to seek outside help to avoid creases.
The pattern is aligned with the glass and the absence of gaps is checked. Smoothing the pattern is done from the center to the edges using a rubber forcing. In places where smoothing is difficult, a plastic spatula can be used.
The film is moistened again and the final removal of the solution is carried out using a distillation wrapped in a napkin. This operation must be done, carefully working along the heating filaments, being careful not to damage them. As a final step, the film is pressed along the perimeter, while the edge is heated with a hairdryer. But be careful - don't overheat the glass!
Car windshield tinting

For tinting the windshield of a car, the same film is used as on the rest of the glass. A light reflecting strip is made from it. The bandwidth can be almost anything, but keep reasonable limits.
The blank for the pattern is cut along the film and, as mentioned above, a small allowance is made. The windshield is wetted with liquid, and the blank is laid out on it with the adhesive. The film is carefully trimmed along the edge of the seal, and the excess is removed.
The pattern is smoothed according to the same principle as the previous ones - vertical folds are allowed. The folds are warmed up with a hair dryer and smoothed out by forcing. When performing this operation, be extremely careful - the windshield does not like sudden temperature changes and the pattern should be heated gradually.
Then the workpiece is folded in half, and before that it is wetted, and notches are made on it at a distance of about 100 mm from the upper edge. The notch is made along the edge of the workpiece and then is carried down a few tens of millimeters at an angle to the horizontal cut. Serifs should be applied as often as possible.
After the serifs are made, the bottom unnecessary material is removed and the workpiece is unfolded. The bottom edge will now have a lot of teeth that are sheared off. This method will allow you to produce reflective strips of almost any width.
The final stage in the manufacture of a pattern is its positioning on the glass and precise trimming. Otherwise, pasting this glass with a film is no different from pasting side windows.
Conclusion
In conclusion, it is worth noting that the manufacture of patterns is carried out outside the car, but pasting with a film is from the inside. This process is not the easiest, but with the right patience, you can cope with it.